

How To Clean Your Keurig Needle
Introduction
The hollow needle that pierces the top of the K-Cup can get clogged by coffee particles. If you try to flush it by forcing tools or fluid into the needle's exit, you risk damaging the back-flow preventing check valve. This guide shows how to disassemble just enough of the head assembly to clean the top needle from its inlet side.
-
-
Identifying the parts: 1.A is the water reservoir cover. 1.B is the "Head". The needle that punctures the K-Cup is in here.
-
-
-
Lift off the water reservoir cover, revealing 2.A: the overflow spout.
-
When the top needle is clogged, running the Keurig will make most of the hot water come out the overflow spout, back into the water reservoir, instead of through your coffee. That symptom lets you know you might benefit from following this procedure.
-
-
-
Point the tip of your Philips-head screw driver up and remove the two screws on the underside of the head. (circled). Be careful you don't drop and lose them!
-
-
-
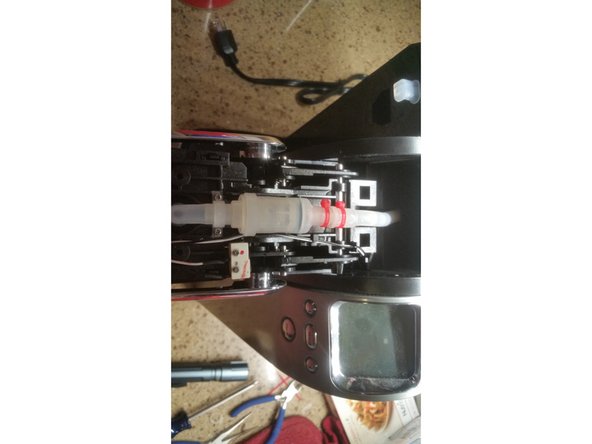
Snip the zip-tie, being careful not to cut into the plastic hose.
-
Detach the plastic hose.
-
Remove the two circled screws.
-
Now, you can remove the top needle assembly by lowering it, done through the bottom of the head assembly.
-
-
-
Blow Out the Top Needle Assembly: Just put your lips on the top plastic, and blow.
-
Blowing on the assembly may not work for some, so push on the back of the valve to break it loose.
-
-
-
Reassembly: perform the dis-assembly steps in reverse order. Watch it, though: the rear of the head cover can go on two ways. Tuck it close to the body of the head, or you won't be able to close the Keurig. Guess how I found **that** out.
-


Conclusion
To reassemble your device, follow these instructions in reverse order.
Embed this guide
Choose a size and copy the code below to embed this guide as a small widget on your site / forum.
Preview
How To Clean Your Keurig Needle
Source: https://www.ifixit.com/Guide/How+to+clean+the+top+needle+of+the+Keurig+B77/5437
Posted by: ishmaelnowerever98.blogspot.com
0 Response to "How To Clean Your Keurig Needle"
Post a Comment